Adding Projects with the Project Wizard

Once you click on the Add button on the toolbar, the following screen displays:
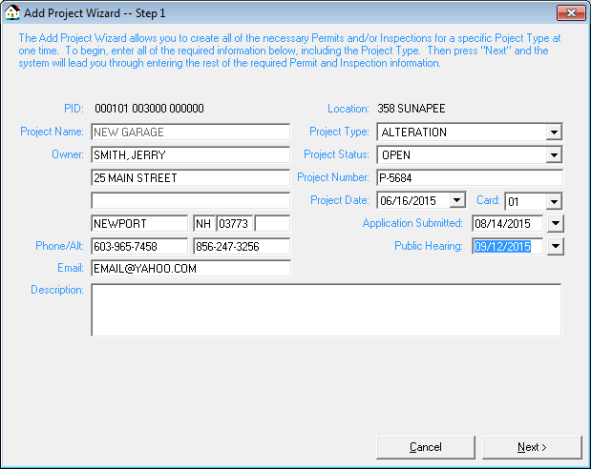
Here you will need to give the Project a name, such as the property owner’s name, the contractor name or any specific Project name that makes sense to you and will help you find it at a later date.
The property PID and location are automatically filled in, as well as the property owner's name and address. You can edit the owner information, but the PID and location are controlled by the Assessing database.
The down arrows at the end of the Construction Type and the Status lines indicate a drop-down list box is available from which you can select options. Select the Construction Type and Status, enter a contact phone number, if one is available and enter any special notes pertaining to the Project. Once completed, click the next button.
The Cancel button will cancel the Project Add Process erasing any entered data for this Project.
When using the wizard, Permits are done first and then the Inspections.
The next series of screens you see will depend on how many Permits and Inspections were required when the Project type was setup using the Project Setup option in the Utilities menu. If “AutoNumber” appears in the Permit or Inspection number field, that is because the auto generate Inspection number option of the Permit / Inspection Setup Screen in Utilities has been activated.
Otherwise, you will need to enter an Inspection number.
Enter the necessary data, as well as any specific notes for this Inspection, then click the Next Button to continue. Once you have completed all of the necessary Permit and Inspection screens, the screen to enter Census data will appear as shown below:
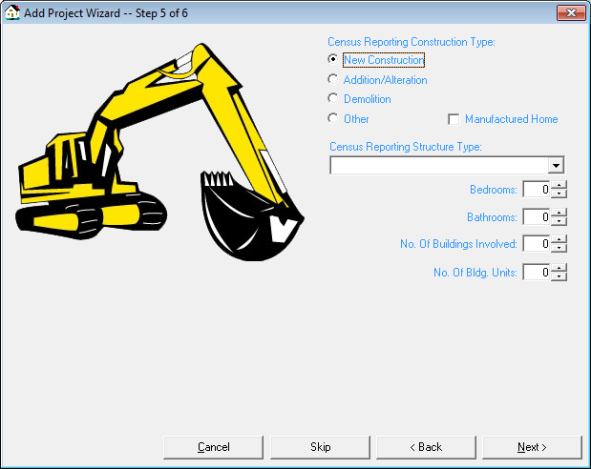
Select the appropriate radio button for the Census Reporting Construction Type then select a Census Reporting Structure Type from the drop-down menu and fill in any additional information that you have on hand. You may choose to bypass the Census Reporting Structure Type by selecting the Skip button. You can always edit an existing Project to add any new data that becomes available.
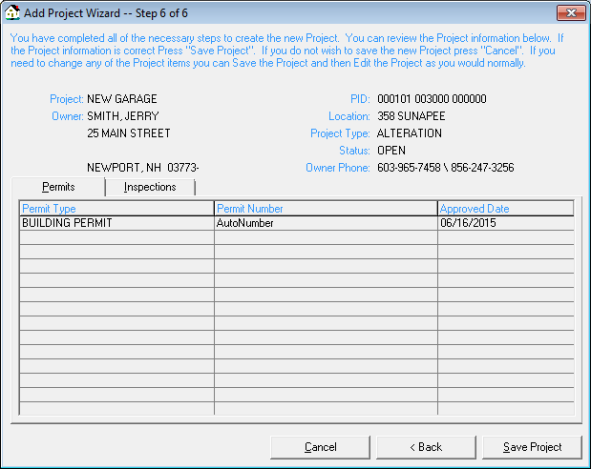
This is the last step of the Project Wizard where you should review the information and save your project. If you have made any mistakes you can select the Back button to edit any information or Cancel if you wish to exit the Project Wizard. Do not be concerned if the amount of steps in your Project differs from what you see in our screenshots. Projects will vary in the amount of steps depending on how many Permits and Inspections they require.